Lighting Techniques for Perfect Vegan Food Photography
Understanding the Importance of Lighting in Food Photography
Lighting plays a crucial role in food photography, especially when capturing the vibrant colors and textures of vegan dishes. Without proper lighting, even the most beautifully plated meal can look dull and unappetizing. Think of lighting as the stage where your food takes the spotlight, highlighting its best features and inviting viewers to take a bite.
Good photography is about depth of feeling, not depth of field.
Natural light is often the best choice for food photography, as it enhances the freshness and vividness of ingredients. Imagine the sun pouring through your kitchen window, casting a soft glow over your salad or smoothie bowl; this is the kind of light that brings your food to life. However, artificial lighting can also be effectively utilized if natural light is unavailable, requiring a different approach to ensure your food still looks mouth-watering.
In this article, we’ll explore various lighting techniques specifically tailored for vegan food photography. From utilizing natural light to mastering artificial sources, you’ll discover how to create images that not only showcase your culinary creations but also entice your audience.
Choosing Natural Light: The Best Source for Food Photography
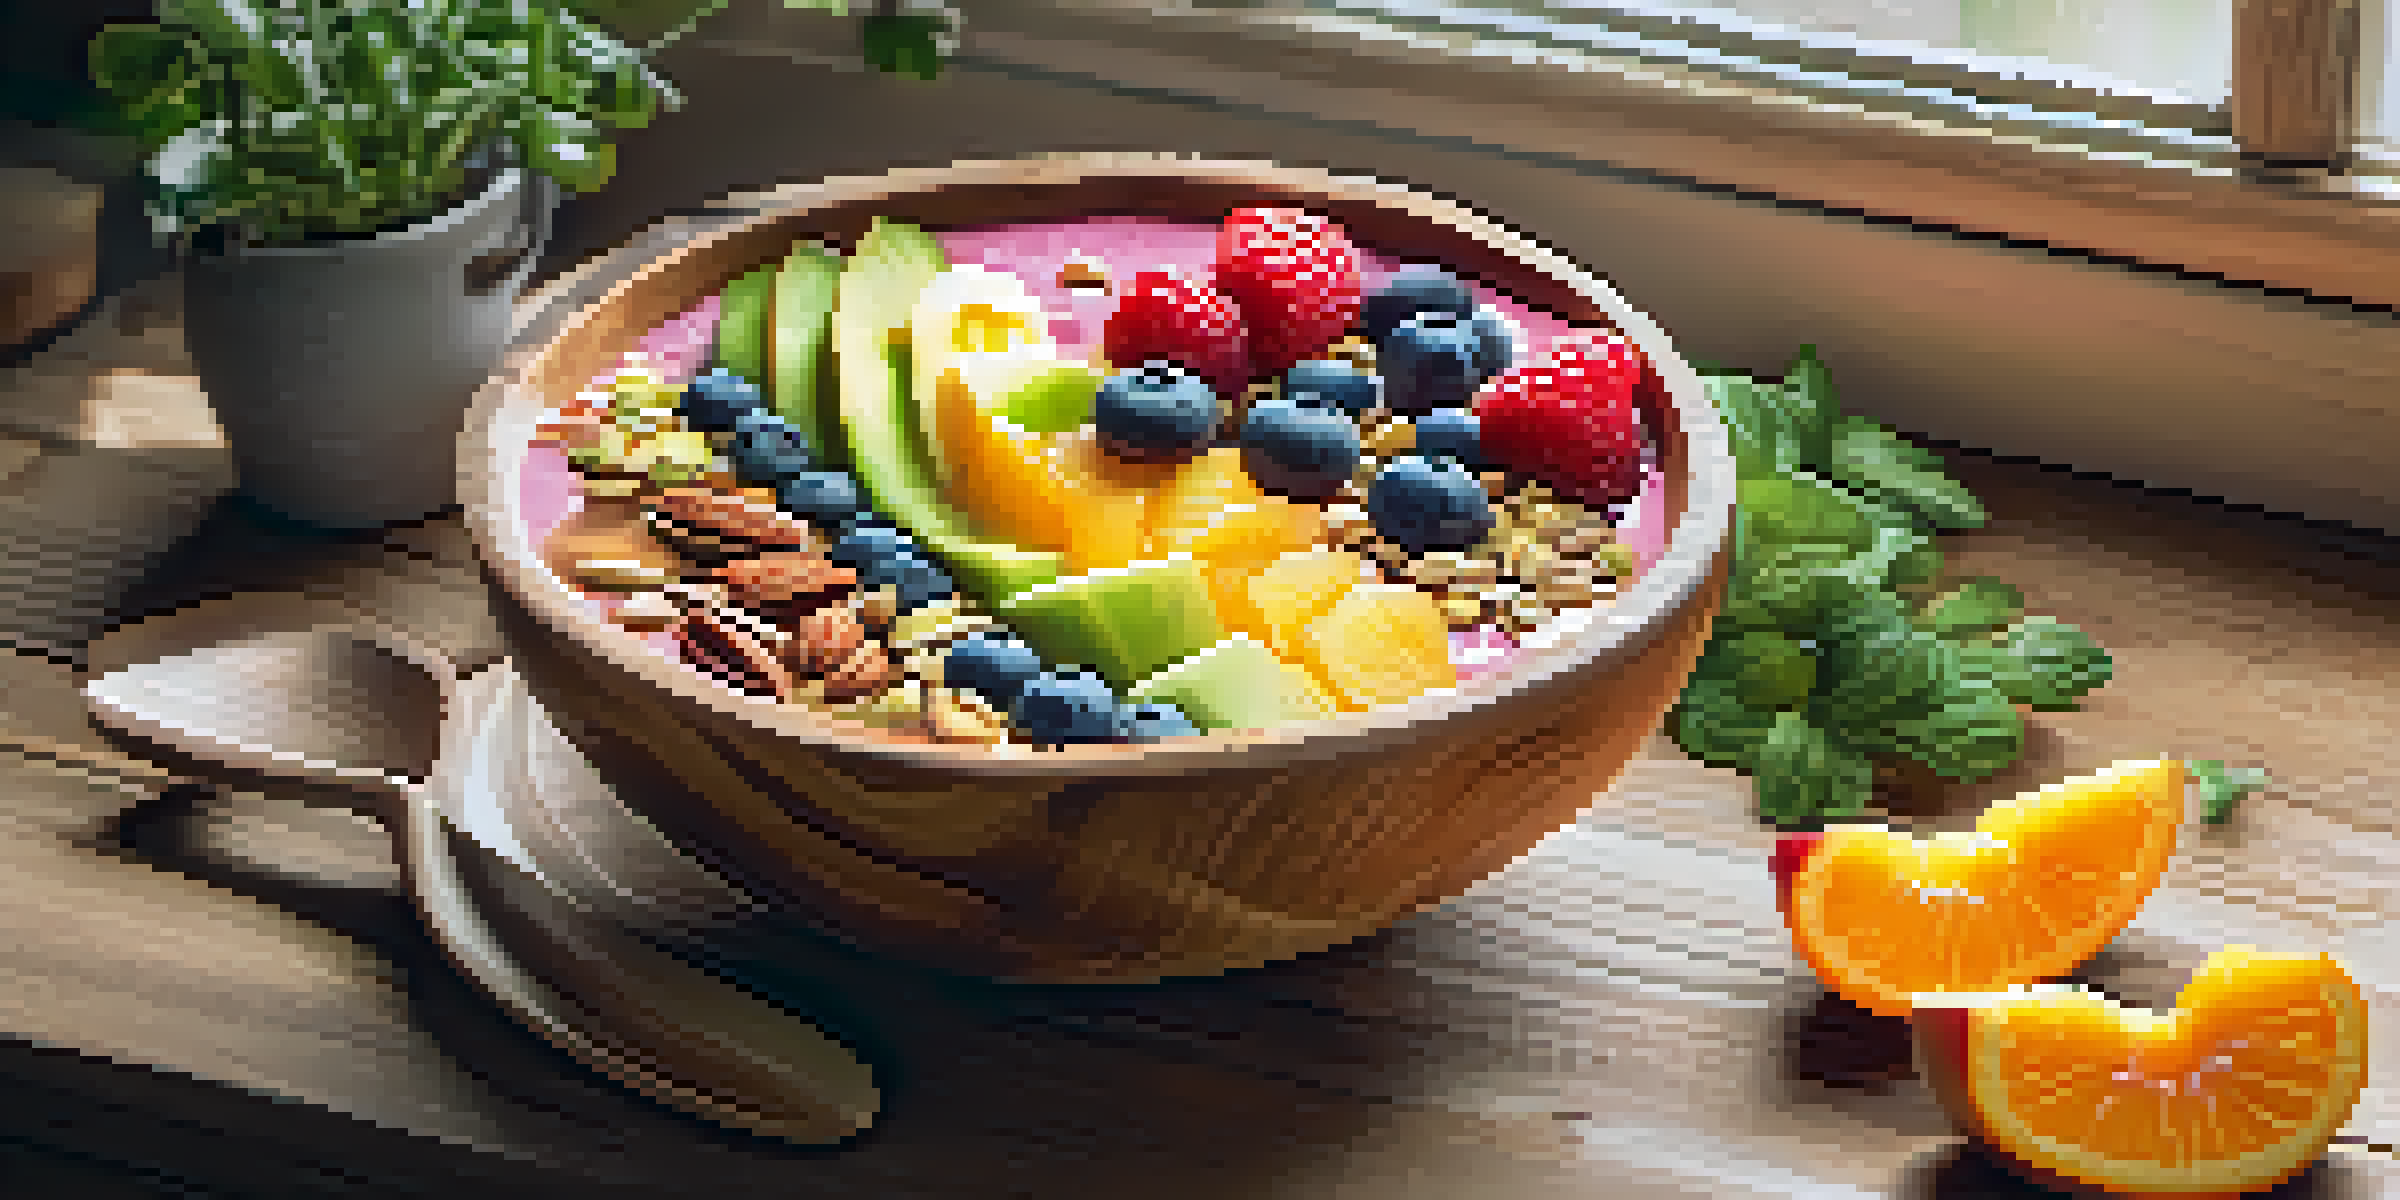
Natural light is often considered the gold standard for food photography, especially for vibrant vegan dishes. The soft, diffused light that comes from a window can enhance colors, making greens look greener and fruits appear juicier. To achieve the best results, aim to shoot during the golden hour—shortly after sunrise or before sunset—when the light is warm and inviting.
Positioning your food near a window can create a beautiful, ethereal quality in your photos. However, keep in mind that harsh sunlight can cast unflattering shadows and create highlights that wash out details. To soften direct sunlight, consider using sheer curtains or a white reflector to diffuse the light, giving your photos a dreamy, professional look.
Natural Light Enhances Food Colors
Utilizing natural light, especially during the golden hour, can significantly enhance the vibrancy and appeal of vegan dishes.
Experimenting with different angles and compositions is essential when working with natural light. Try shooting from above, at eye level, or even from the side to see how the light interacts with your dishes. This playful exploration helps you understand how to best capture the essence of your vegan food.
Artificial Lighting: When and How to Use It Effectively
While natural light is preferred, there will be times when artificial lighting is necessary, especially in poorly lit environments. Softbox lights or LED panels can help create a controlled lighting setup that mimics natural light. This allows you to shoot at any time of day without worrying about lighting conditions, making it easier to plan your photography sessions.
The best camera is the one you have with you.
When using artificial lights, the key is to diffuse the harshness that can come from direct light sources. Softboxes and diffusers can soften the light and create a more pleasant look. You can also adjust the color temperature of your artificial lights to match the warm tones of natural light, ensuring your vegan dishes look fresh and appealing.
Don't forget about the placement of your lighting. Experiment with backlighting, sidelighting, or even overhead lighting to find what best showcases your food. Each angle creates a different mood and can highlight specific textures and colors in your dishes.
Using Reflectors to Enhance Your Food Photography Lighting
Reflectors are a fantastic tool for enhancing your food photography by bouncing light onto your subject. They can help fill in shadows and add a beautiful glow to your vegan dishes, making them appear more appetizing. You can use professional reflectors or even DIY options like a piece of white cardboard or aluminum foil to achieve similar effects.
Position your reflector opposite your light source to direct light back onto the darker side of your dish. This technique can help create depth and dimension, making the food look more three-dimensional. Just be mindful of the angle and distance, as too much reflection can create unwanted glare.
Artificial Light for Controlled Shooting
When natural light isn't available, artificial light sources like softboxes can mimic natural lighting effects, allowing for flexible shooting conditions.
Incorporating reflectors into your setup can dramatically improve your images without needing advanced equipment. With a bit of experimentation, you'll find the perfect balance between light and shadow, bringing out the vibrant qualities of your vegan food.
Backlighting: Creating Stunning Silhouettes and Highlights
Backlighting is a technique where the light source is positioned behind your subject, creating dramatic silhouettes and highlighting textures. This method works particularly well for transparent or semi-transparent vegan dishes, like salads with vinaigrette or drinks in clear glasses. When done correctly, backlighting can produce captivating images that draw viewers in.
To effectively utilize backlighting, consider the time of day and the intensity of your light source. Shooting during the golden hour can provide a warm, inviting glow that enhances your photos. You can also use reflectors to create a more balanced look, ensuring that the front of your dish is well-lit without losing the backlight effect.
Experimenting with backlighting can lead to unique and artistic results. Play with the composition and focus to find the right balance between light and shadow, creating an image that tells a story about the vegan dish you’re showcasing.
Side Lighting: Adding Depth and Texture to Your Photos
Side lighting is another technique that can add depth and texture to your food photography. By positioning your light source to the side of your subject, you can create interesting shadows that enhance the three-dimensional quality of your vegan dishes. This approach works particularly well for foods with interesting textures, like crusty bread or layered desserts.
The angle at which you shoot can significantly affect the outcome. A slight tilt can change the way the light interacts with your food, revealing details that might otherwise be overlooked. Remember, the goal is to celebrate the unique characteristics of your ingredients, and side lighting can help achieve that.
Reflectors Add Depth and Dimension
Using reflectors can fill in shadows and create a more dynamic look in food photography, enhancing the visual appeal of your dishes.
Additionally, side lighting allows for dramatic contrasts that can evoke a certain mood. Whether you're aiming for a cozy, intimate vibe or a bright, fresh feel, playing with side lighting can help you convey the right message through your food photography.
Experimenting with Mixed Lighting for Unique Effects
Mixed lighting involves combining different sources of light—natural and artificial—to create unique effects in your food photography. This technique can introduce a dynamic quality to your images, allowing for creative exploration. For instance, you might use natural light from a window and supplement it with a warm artificial light to create a cozy atmosphere.
When experimenting with mixed lighting, it's important to be mindful of the color temperatures of your light sources. Balancing the warmth of natural light with cooler artificial light can be tricky, but it can also lead to stunning results. Use a color checker or adjust your camera settings to ensure the colors in your vegan dishes remain true to life.
This approach gives you the freedom to be creative and try new techniques. Don’t hesitate to play around with different combinations until you find what resonates with your style and the message you want to convey through your photography.